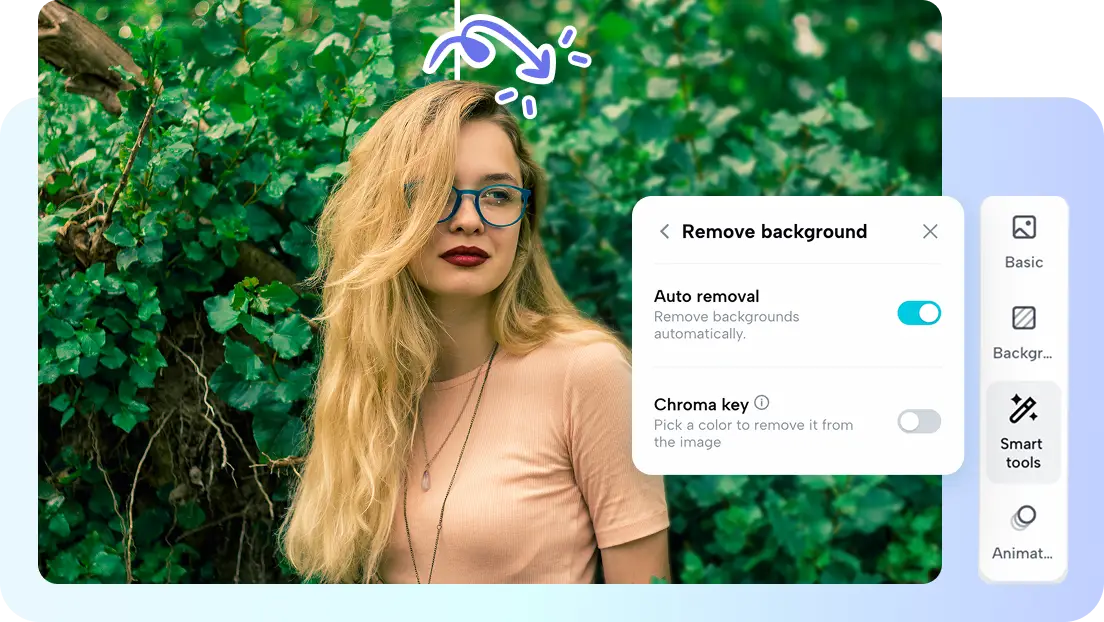
Looking to explore the world of video editing but feeling like a novice? CapCut Desktop video editor is here to make your creative journey a breeze! This tool is incredibly versatile and comes with professional options like a green screen. These practical gems have a simple and easy-to-use interface for beginners. Chroma Key (green screen) is a special bonus and is the ability to replace a solid colored background, typically green—with any image or video of your choice. You will soon learn, that the possibilities are endless and the procedure is not complicated as it seems.
So, let’s check out the CapCut Desktop Green Screen editing guide below and explore the numerous opportunities this CapCut video editor for pc can offer you as a content creator.
Step 1 Download CapCut Desktop Video Editor
To use this program, start by downloading CapCut Desktop on your device. After that, open the application and create a new project to design something and bring your visions into existence.
Step 2: Bring Your Media to the Canvas
Load your green screen video and the background that you want to use, simply drag and drop it into the media library, or use the intuitive "Add Media" option to browse and select files.
Step 3: Drag Clips to the Timeline
Place the green screen video on the top layer of the timeline and the replacement background on the layer below. This stacking order ensures that once the green has been taken down, the background will be seen in its stead.
Step 4: Select the Green Screen Clip
Click on the video layer with the green screen footage to highlight it.
Step 5:Open the Chroma Key Tool
Go to the editing toolbar which is often located above or to the side of the preview screen and click on the Chroma Key setting. This is where the tool panel can be opened to tweak Chroma Key configurations, which include options like the green button.
Step 6: Choose the Colour to Remove
For this, employ the Colour Picker tool to comprehend the green background in your video. If you click on any green part in the preview window of the video, CapCut will mark all green regions as areas to be removed.
Step 7: Fine-Tune the Effect
Adjust the following sliders to achieve a clean and professional result:
Intensity: This controls how much green is removed. For the remaining green spots, one can slightly increase the intensity of the brush but should be careful not to overdo it as it will impact the subject edges.
Shadow: Using this slider, you can fine-tune the transition between the subject and the new background by controlling the unpleasant lines or halos.
Step 8: Preview the Changes
Play the last few seconds if you have to make adjustments to the green screen effect. You should look at the edges of the image to see if there are any artifacts or spots that seem imperfect in any way. You can also use the CapCut caption generator to generate subtitles.
Step 9: Refining the Edges
For a polished look, refine the edges of your subject:
Edge Feather
This tool eliminates the sharp edges of your subject by blending it more naturally with the background. Gently increase the feathering to make them non-abrupt.
Opacity Adjustments
Decrease the opacity slightly if you want to incorporate a translucent look which adds perspective or life to your creation depending on the context.
Step 10: Customising Your Background
Now that your green screen background is removed, customize the new background to suit your creative vision:
Resize or Reposition: For successful blending of the background with the object of your image, you should adjust the size and location of the background to that of the object.
Add Filters or Effects: Use CapCut’s filters, or text-to-speech AI tools to fine-tune your video.
Tips for Successful Green Screen Editing
Ensure Good Lighting: Shooting on a green screen with even lighting reduces the chances of having spots of shadow and color which affect the process of keying.
Choose the Right Background: Choose a background that would go well with the subject to give a natural-looking image.
Experiment with Settings: Regardless of the specific video content, each video will be different, so take time and fine-tune the Chroma Key settings.
Use High-Quality Footage: The use of HD or 4K footage will guarantee well-defined edges in the final outcome.
Conclusion
CapCut Desktop combines simplicity and sophistication, making it a go-to tool for Chroma Key editing. It has one of the best interface and controls that enables users to transform their green screen projects into beautiful productions with much ease. Whether you are creating entertaining vlogs, informative tutorials, or Hollywood-like videos, CapCut supports you in realizing your ideas. Get ready to embrace the possibilities, explore its features, and take your video editing skills to the next level!


