It won’t take long after getting to the library in Castlevania: Belmont’s Curse for you to spot all the strange globes scattered around it. Normally, you’d have to explore, find hints as to how to progress, jot down some notes, and then activate all of the implements. Luckily for you, we’re here to make things easier for you. This guide is going to show you how to activate all three without having to figure anything out on your end.
How to activate the Library globes in Belmont’s Curse
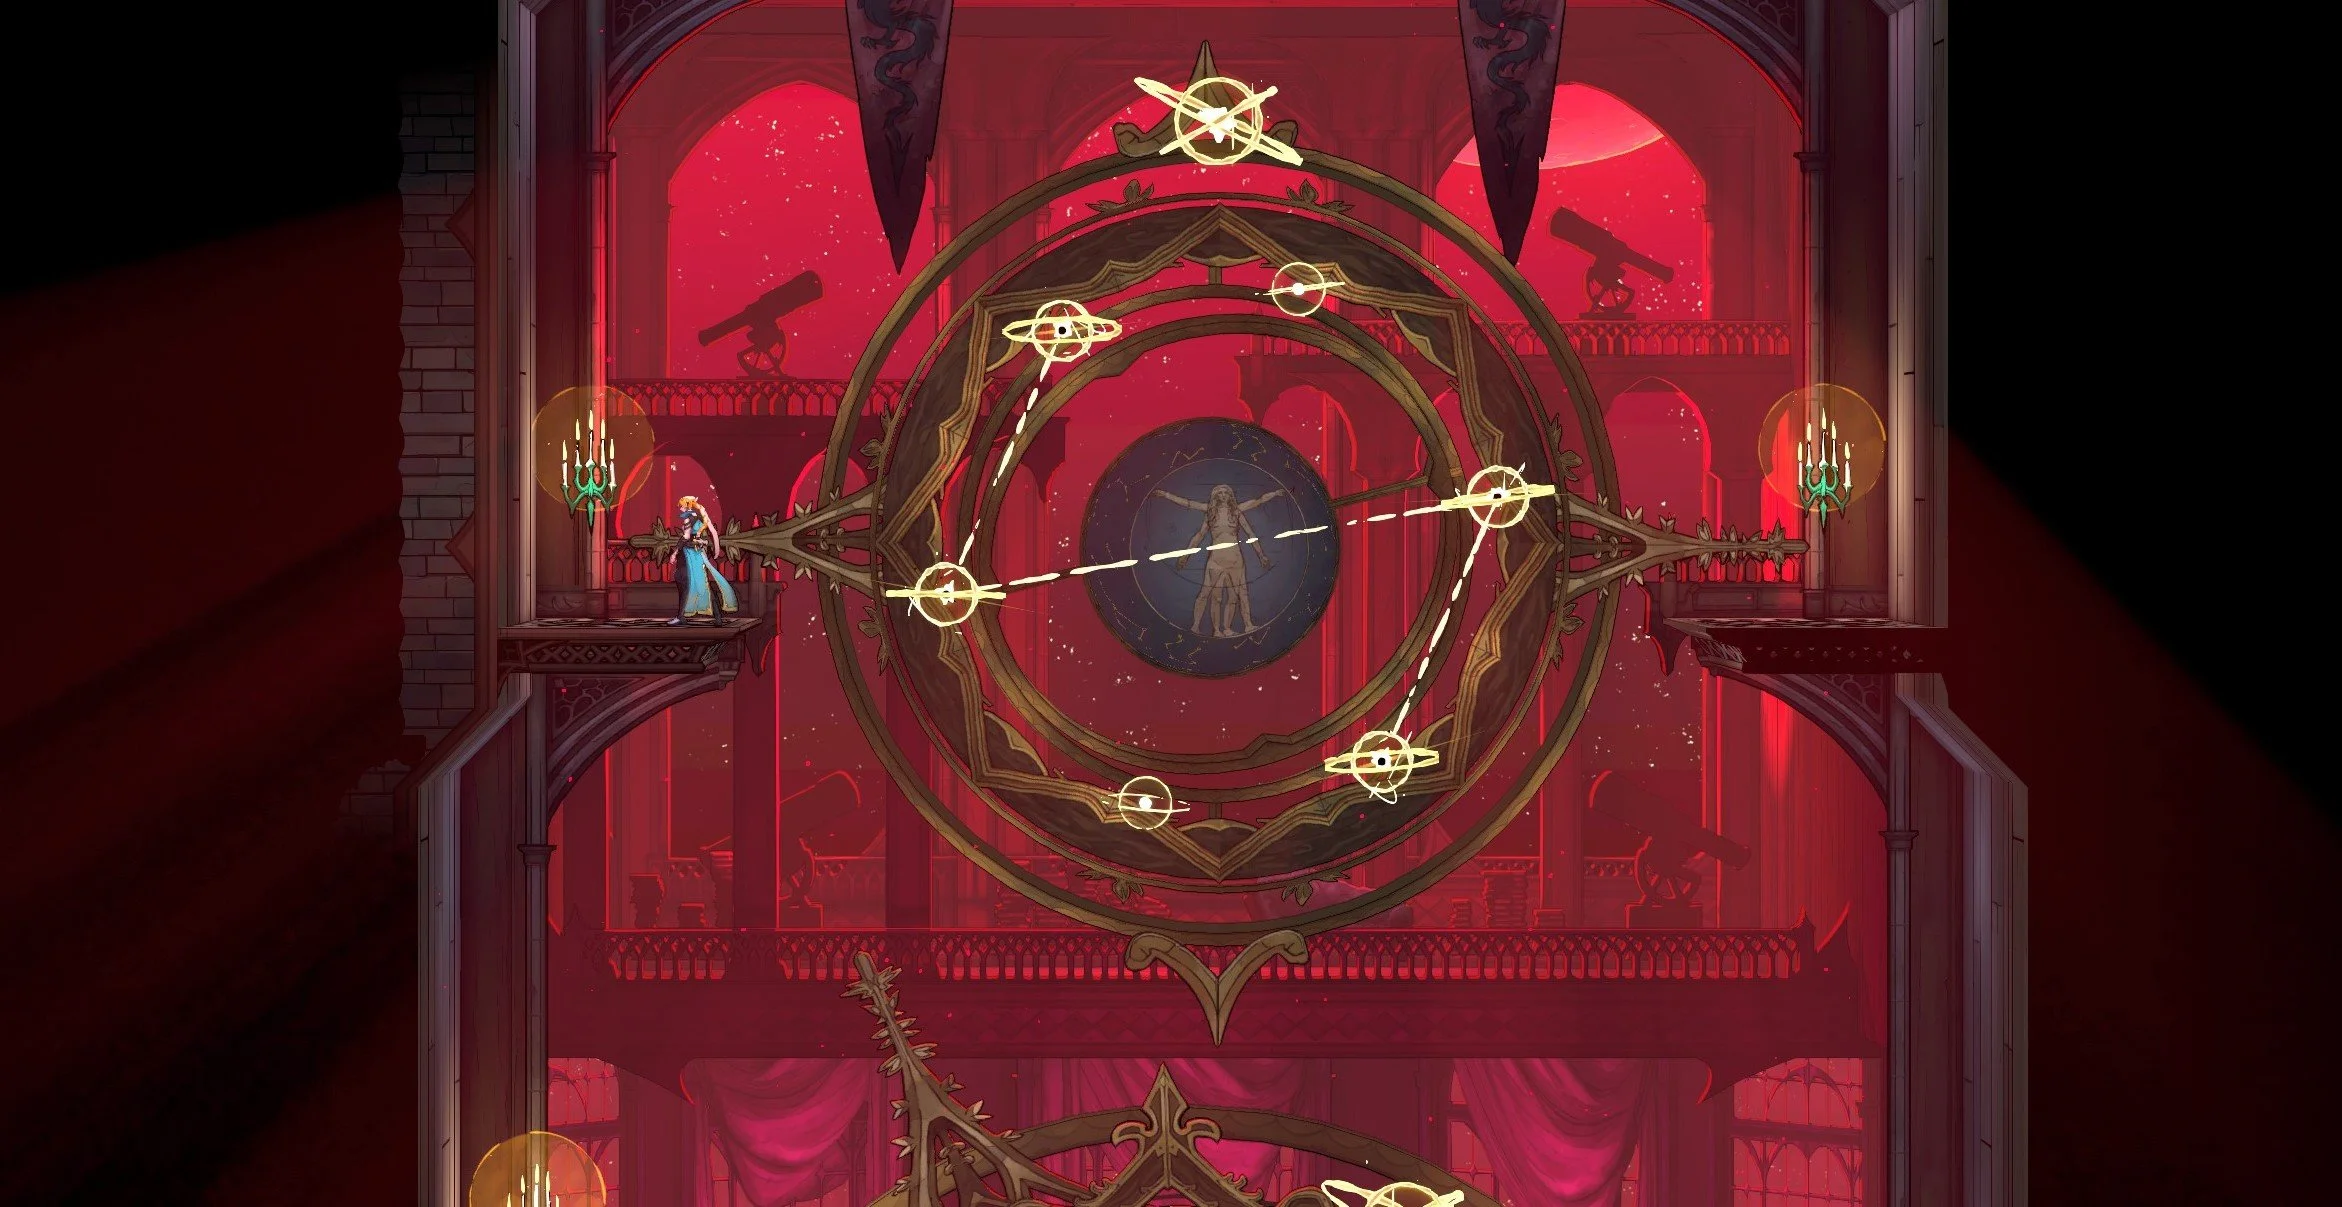
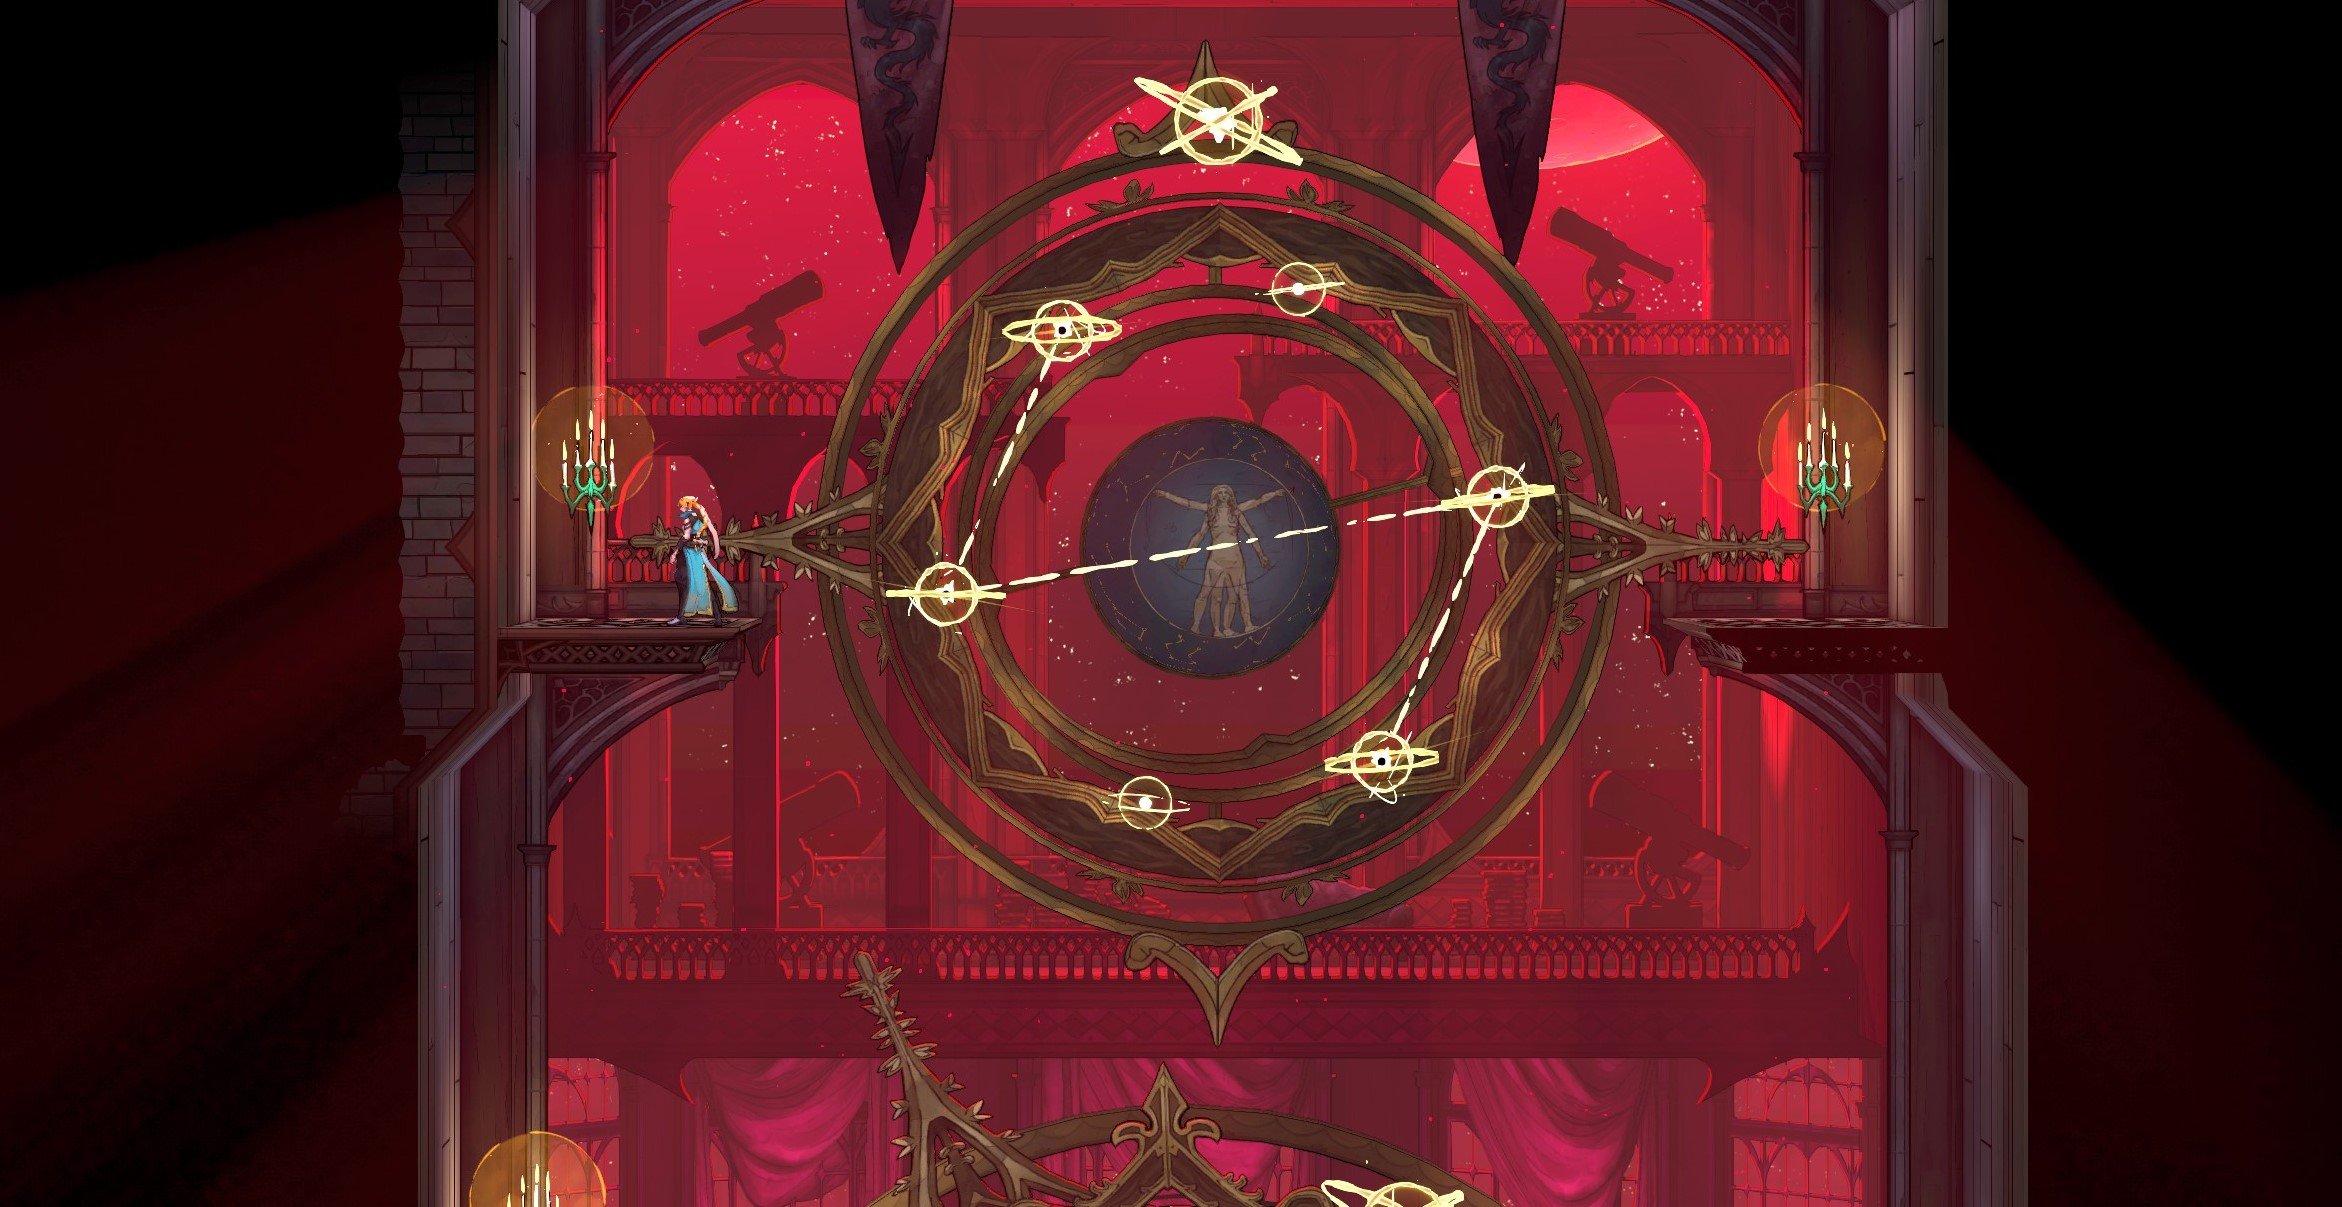
After kicking around the library for a bit, you’ll notice three different types of globes with a bunch of bounce points on them. You can’t do anything with these without the proper knowledge, though. One interesting thing to note is that the Library is predominately knowledge gated, so as long as you know the solutions to the globes, you can mostly go straight to the boss if you so choose.
Each globe has a sort of passcode on it where you need to jump on four specific points in order to have a more powerful bounce point appear at the top that gives you lots of extra air. Belmont’s Curse doesn’t quite tell you this outright, but it does give you a very strong hint in the document pictured below.
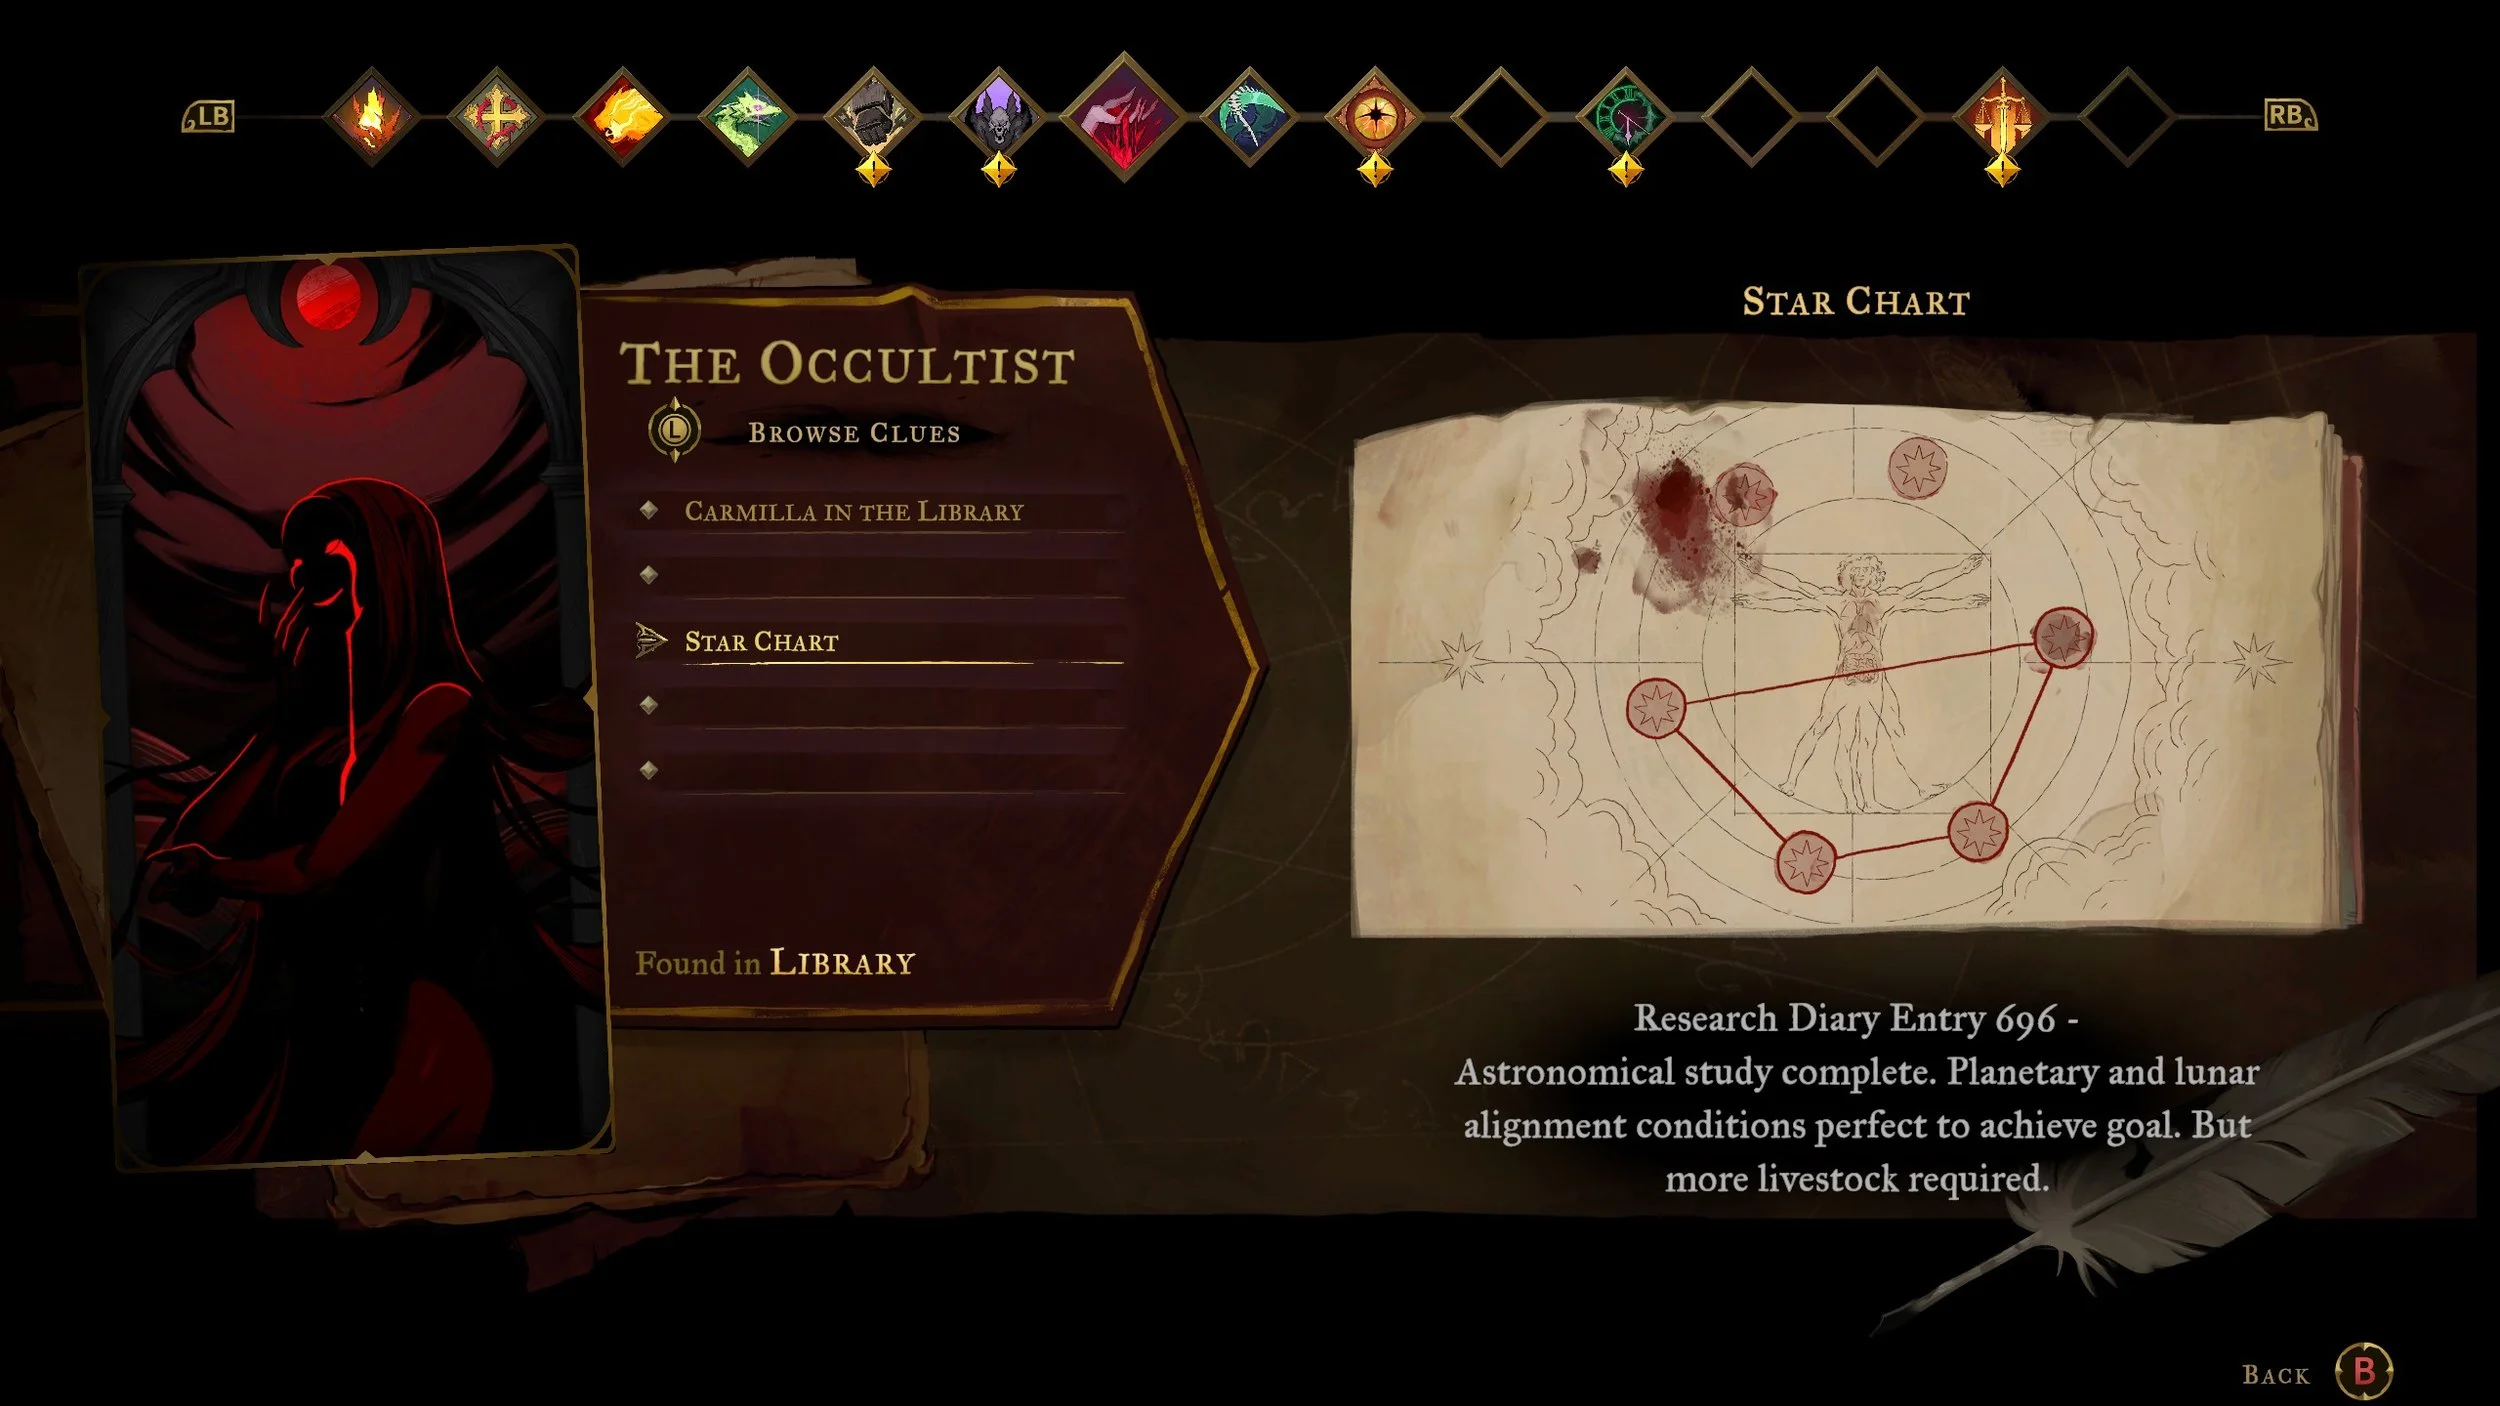
That star chart shows you exactly what you need to input to activate this one specific globe. The above chart pictures a man, but the other two include a woman and a skeleton that each have their own solutions. When you input the solution into the man’s globe, it looks like this.
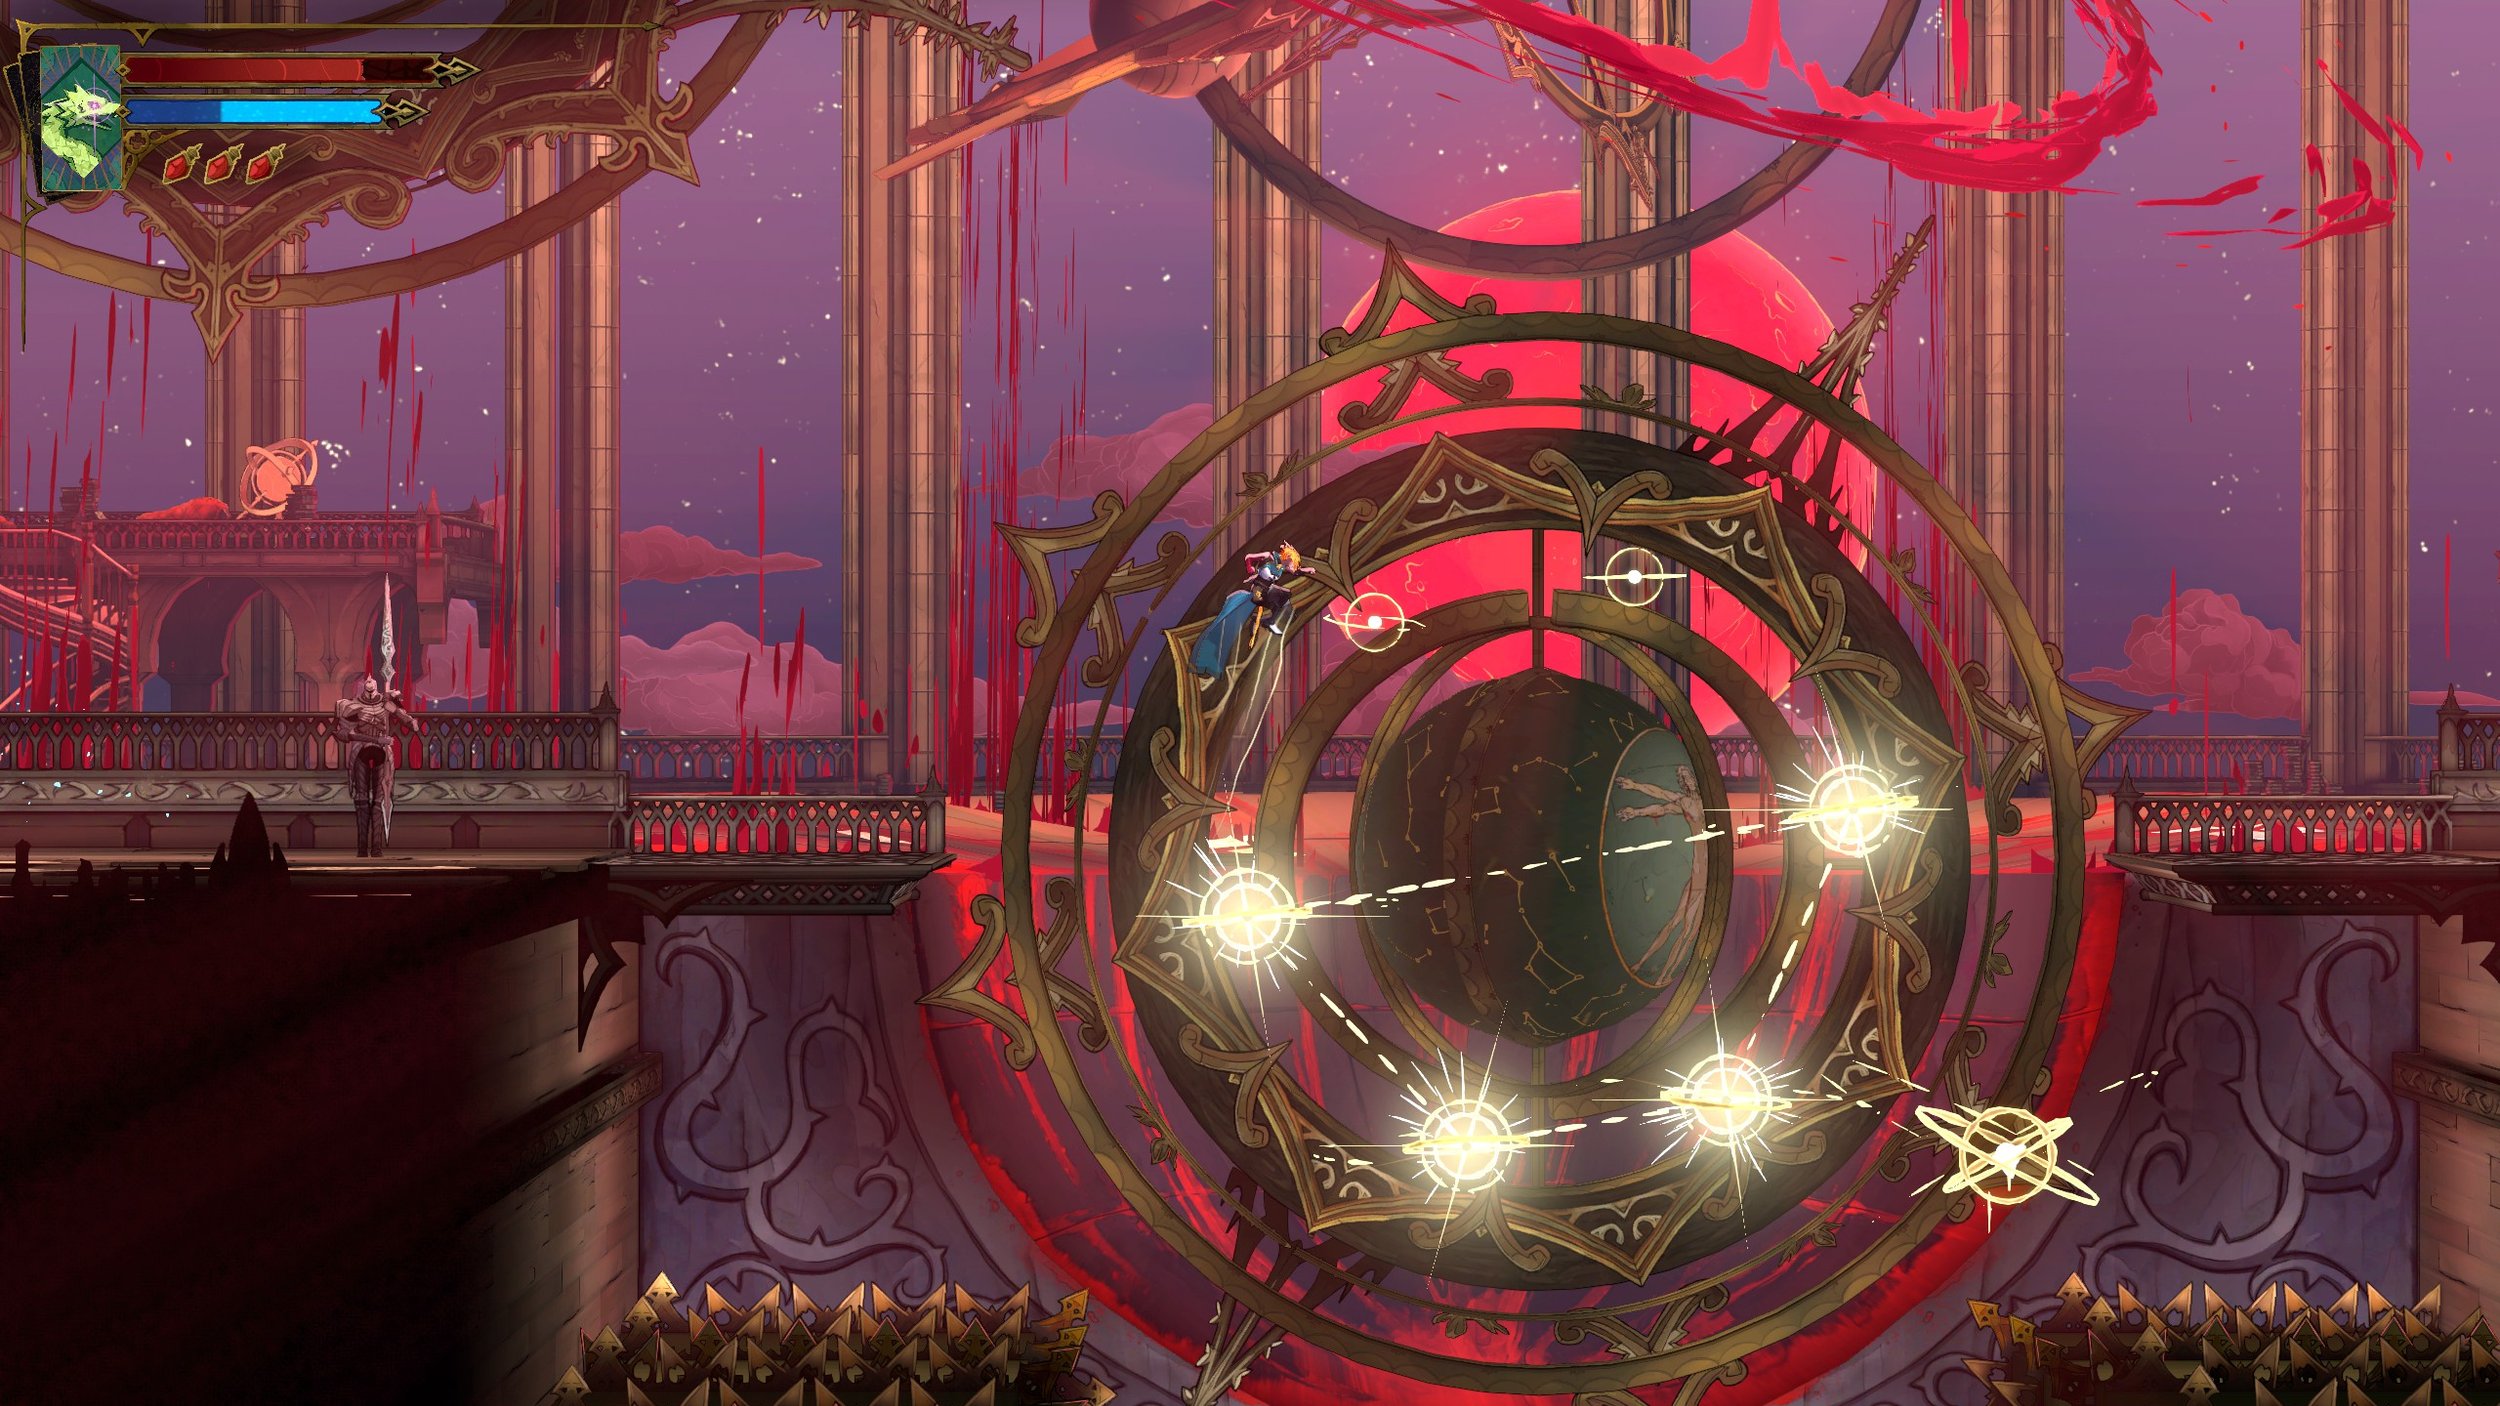
When you input the above correctly, you’ll be able to advance. Simple enough, right? Well, the other two aren’t quite as forthcoming. Exploring will lead you to another room that contains the solution to the woman’s globe, but instead of outright telling you the solution as per the chart above, it’s presented as a bit of a riddle, which we’ll explain now.
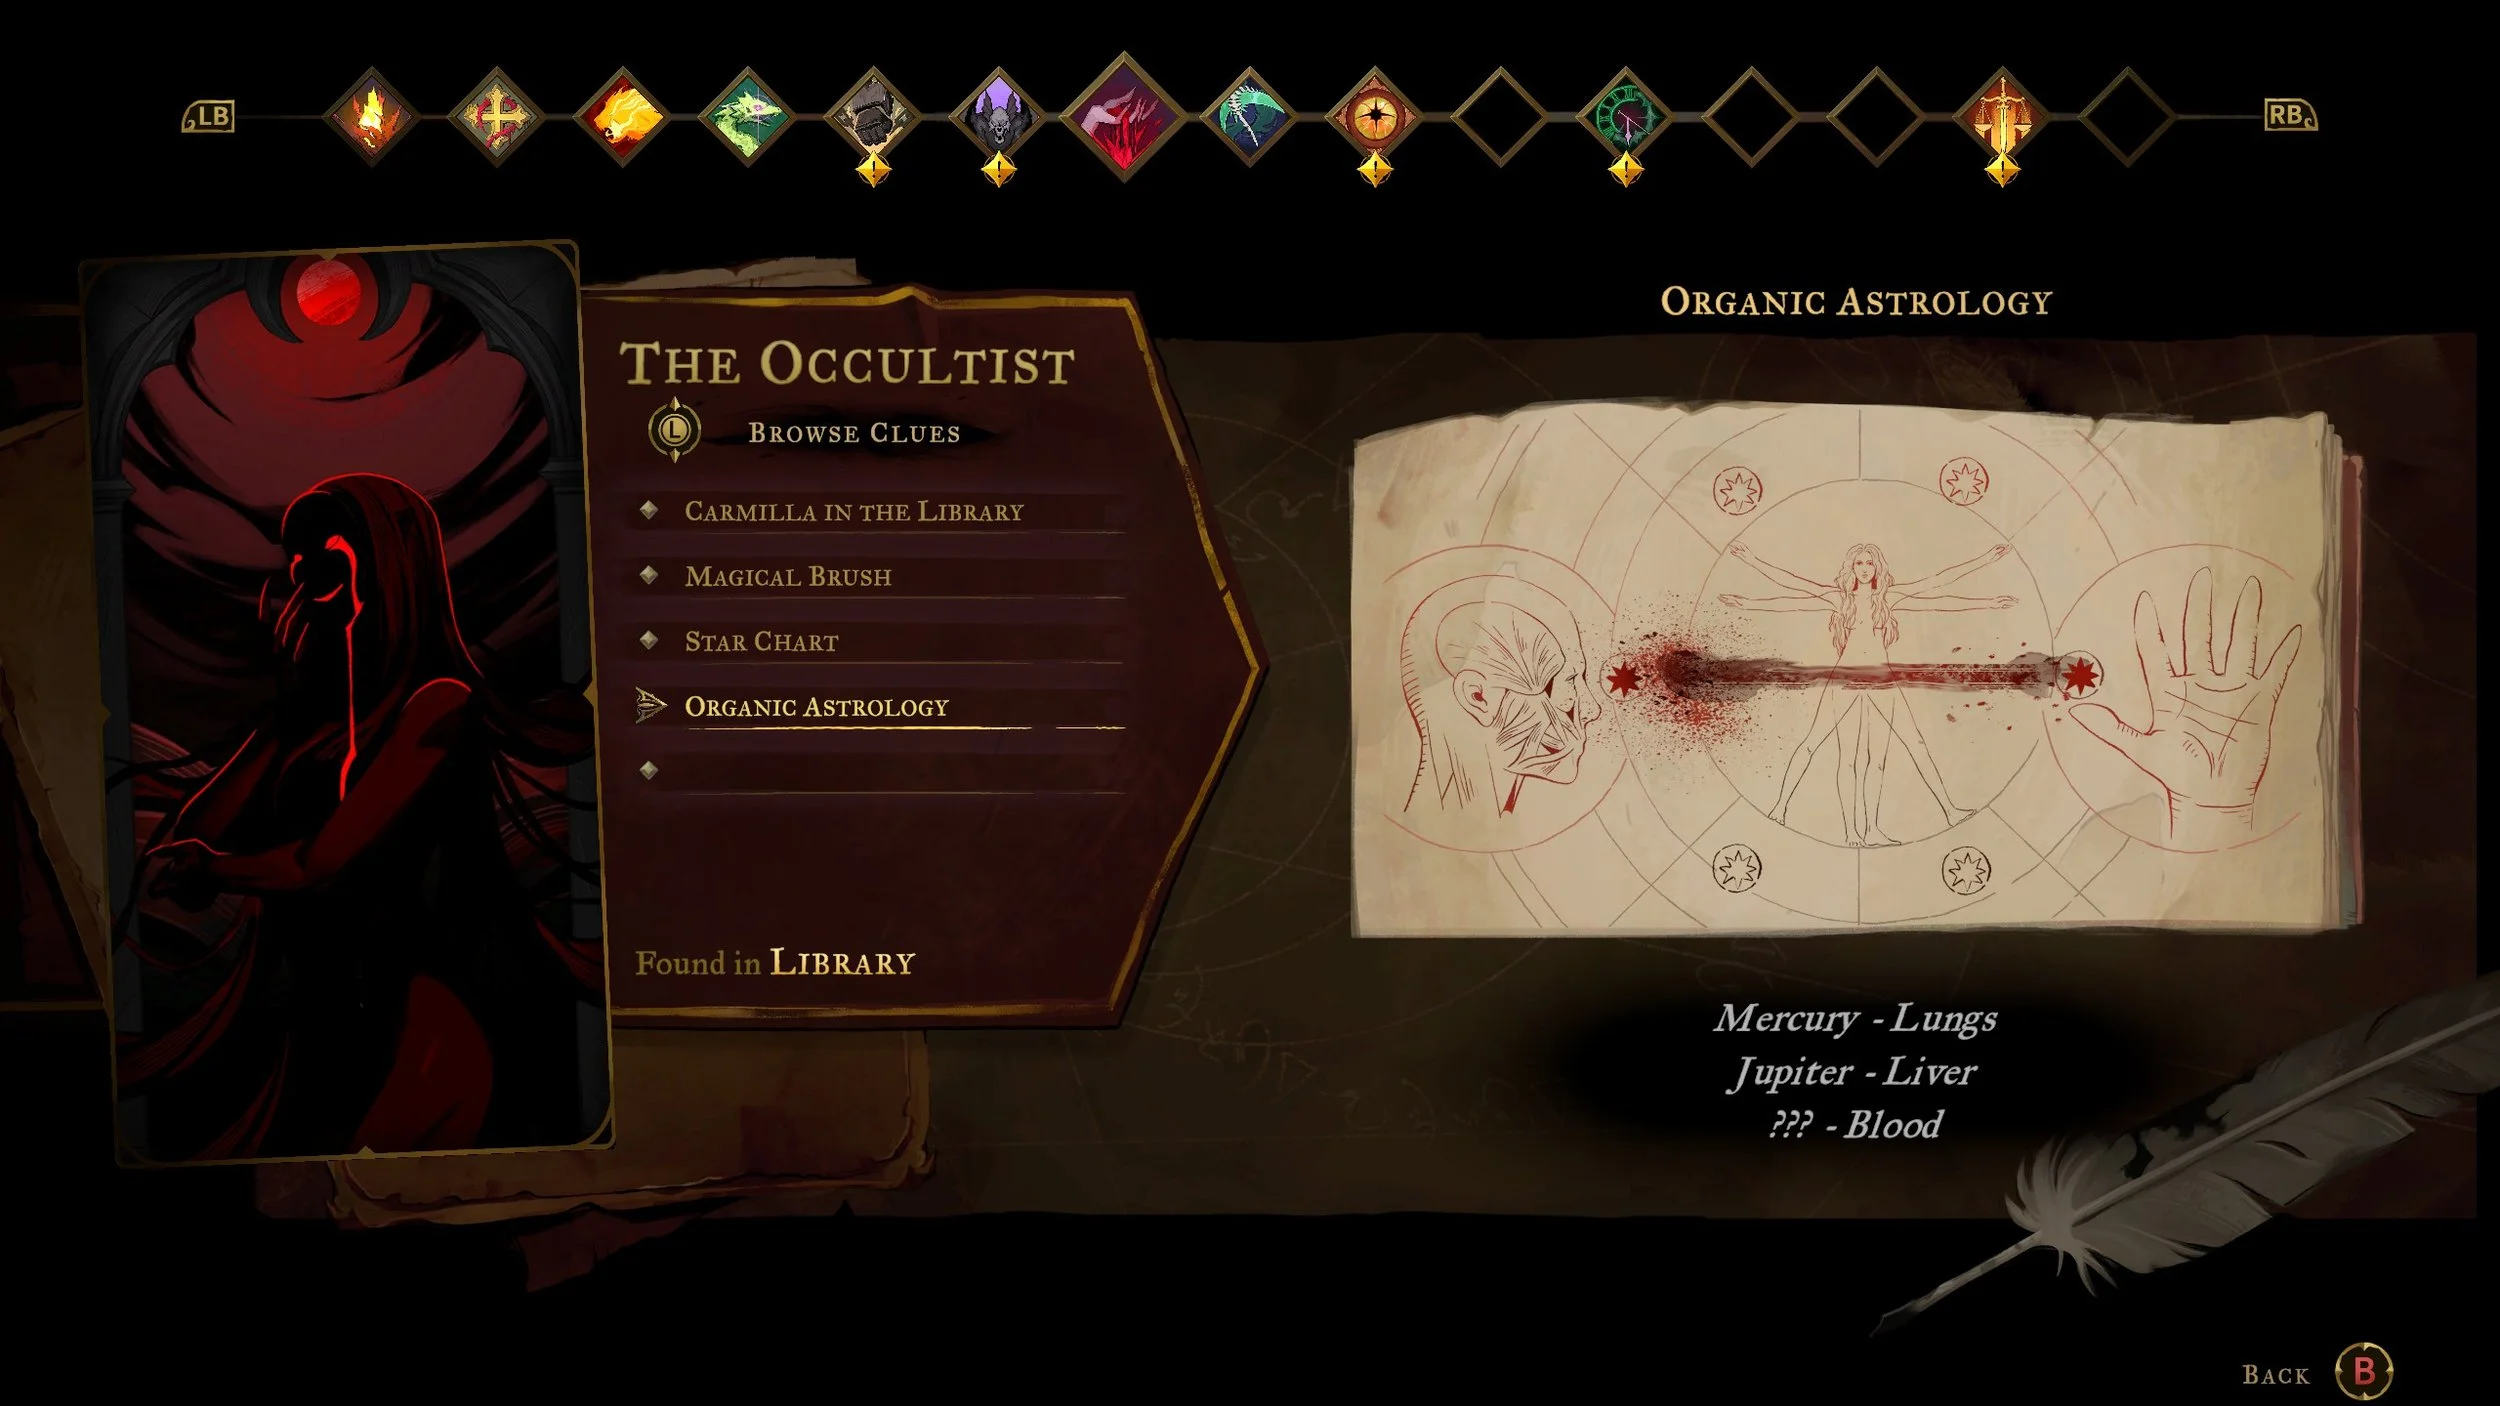
As you can see, it’s a straight line between a head and a hand. But what does that mean exactly? The game wants you to poke around the environment a bit more, as the clues are in the room. However, there are some false details to throw you off the scent, as it were. The correct pieces of information are here.
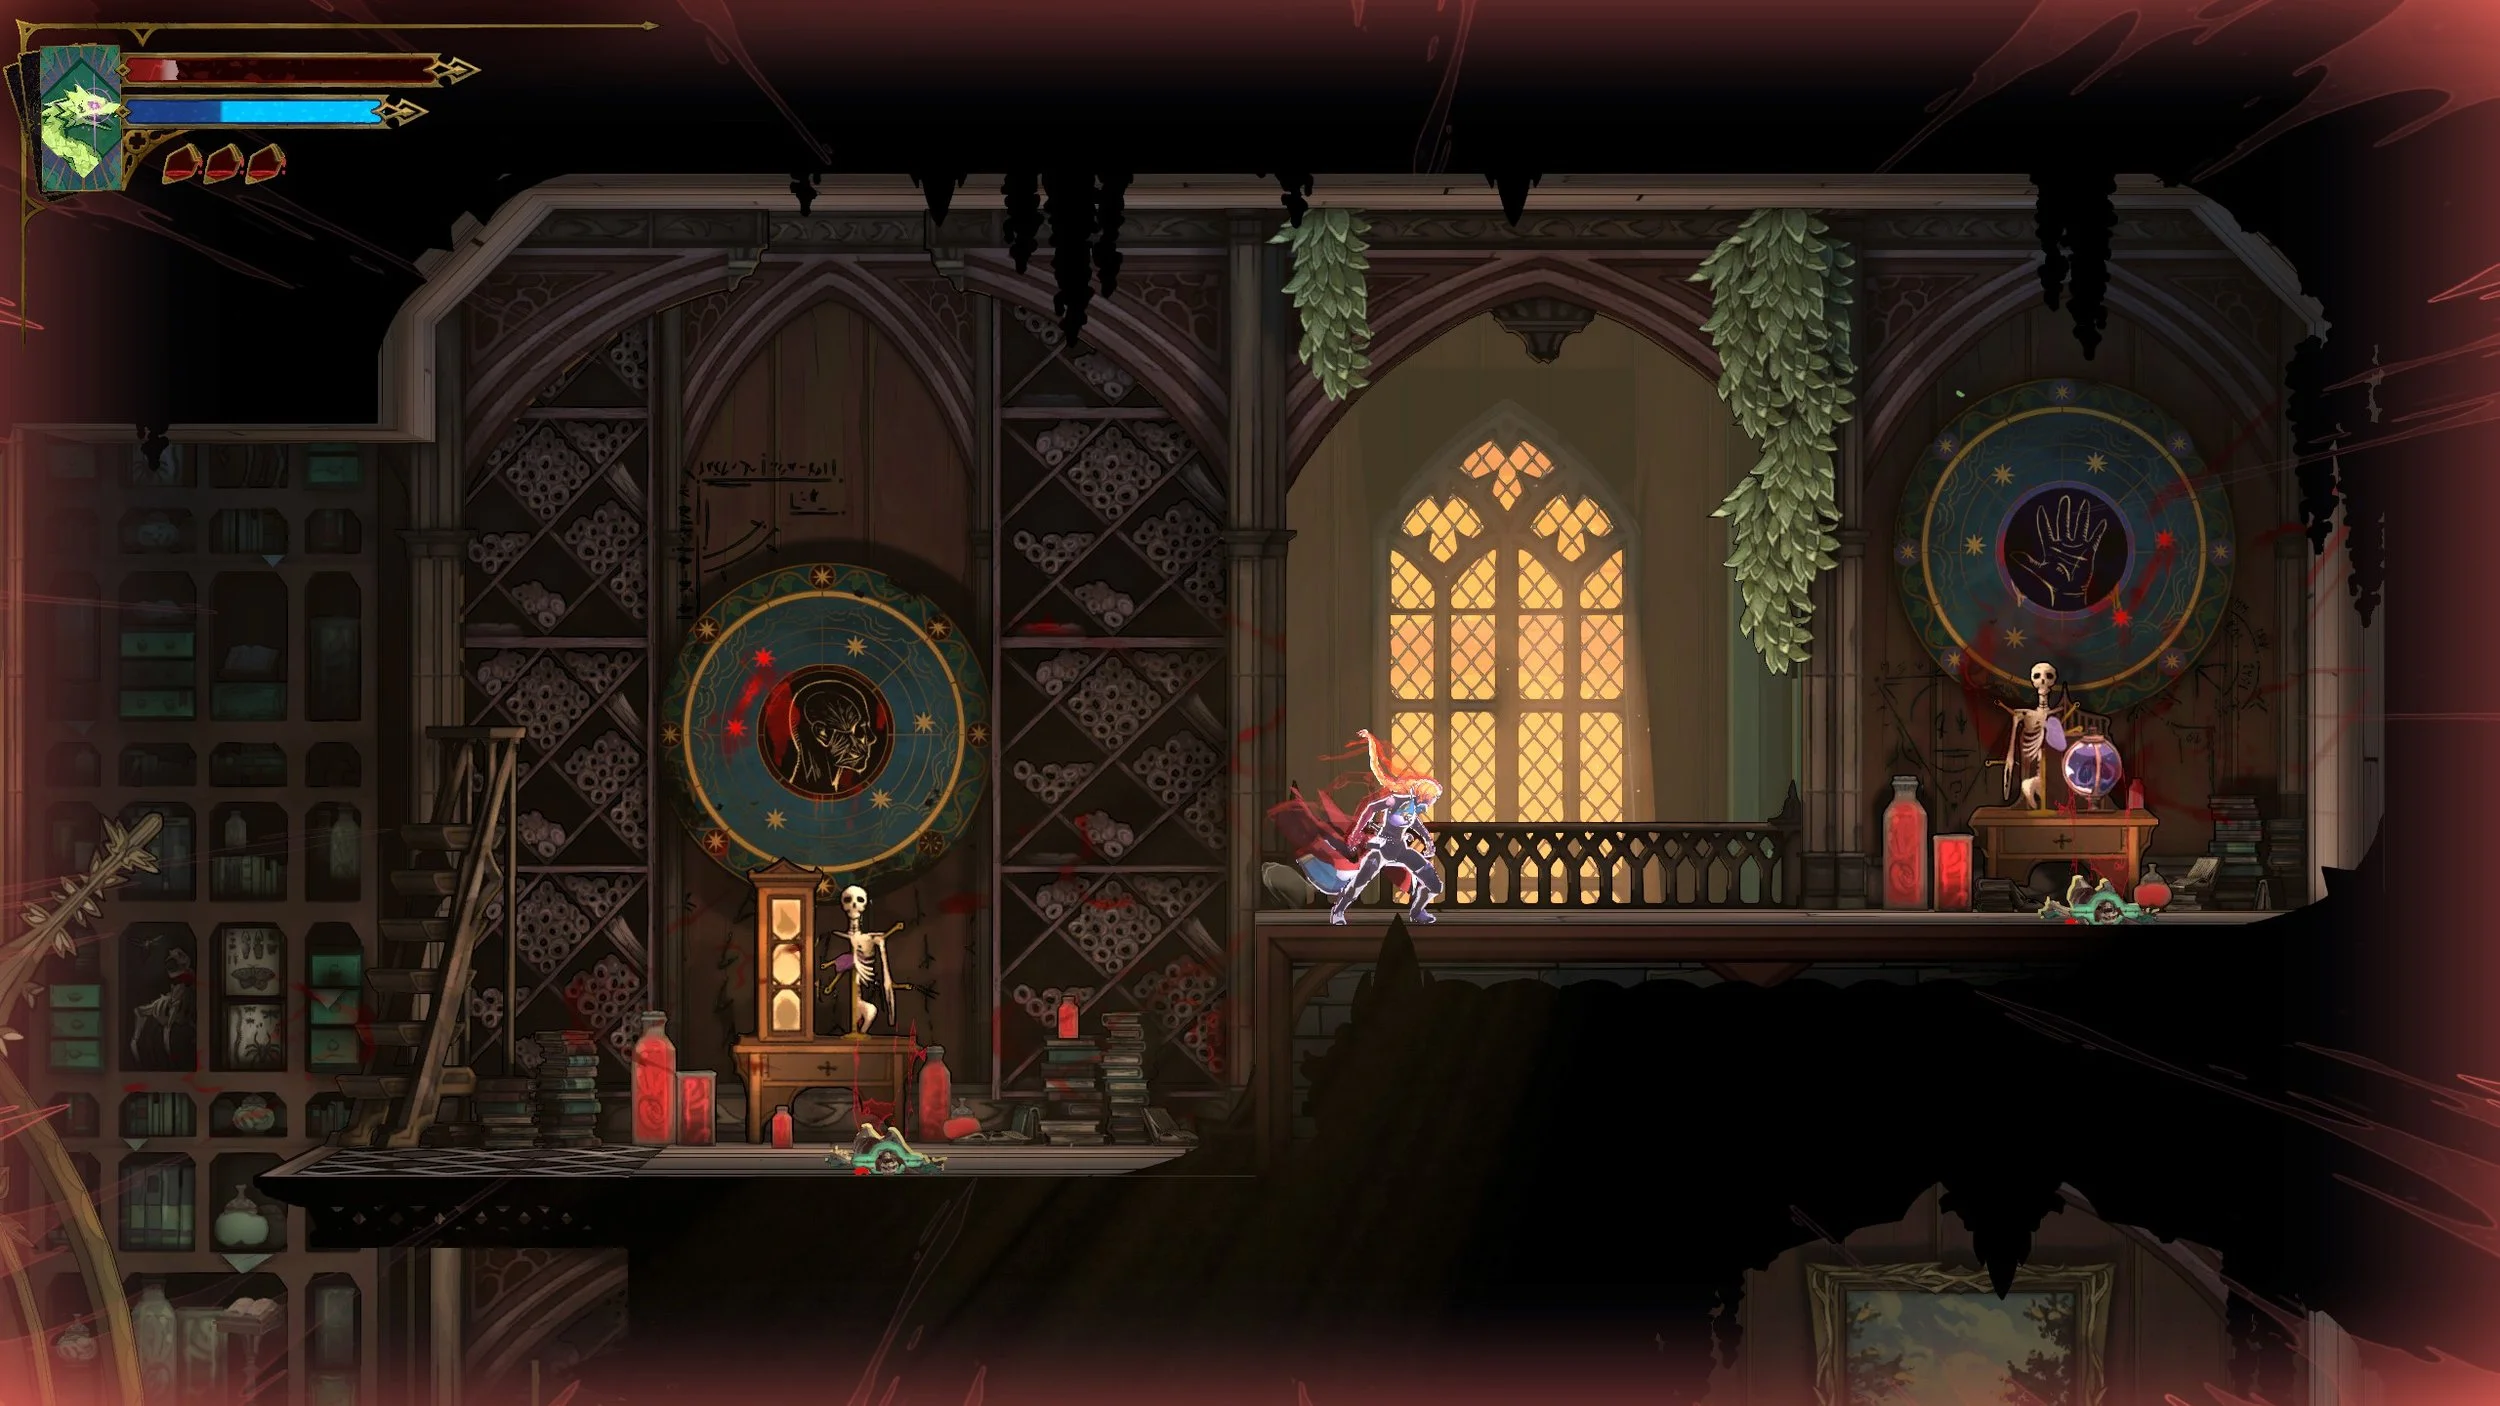
What you need to do is combine the two, which will give you the correct solution. I’ve inputted it into one of the woman’s globes, which looks as follows.
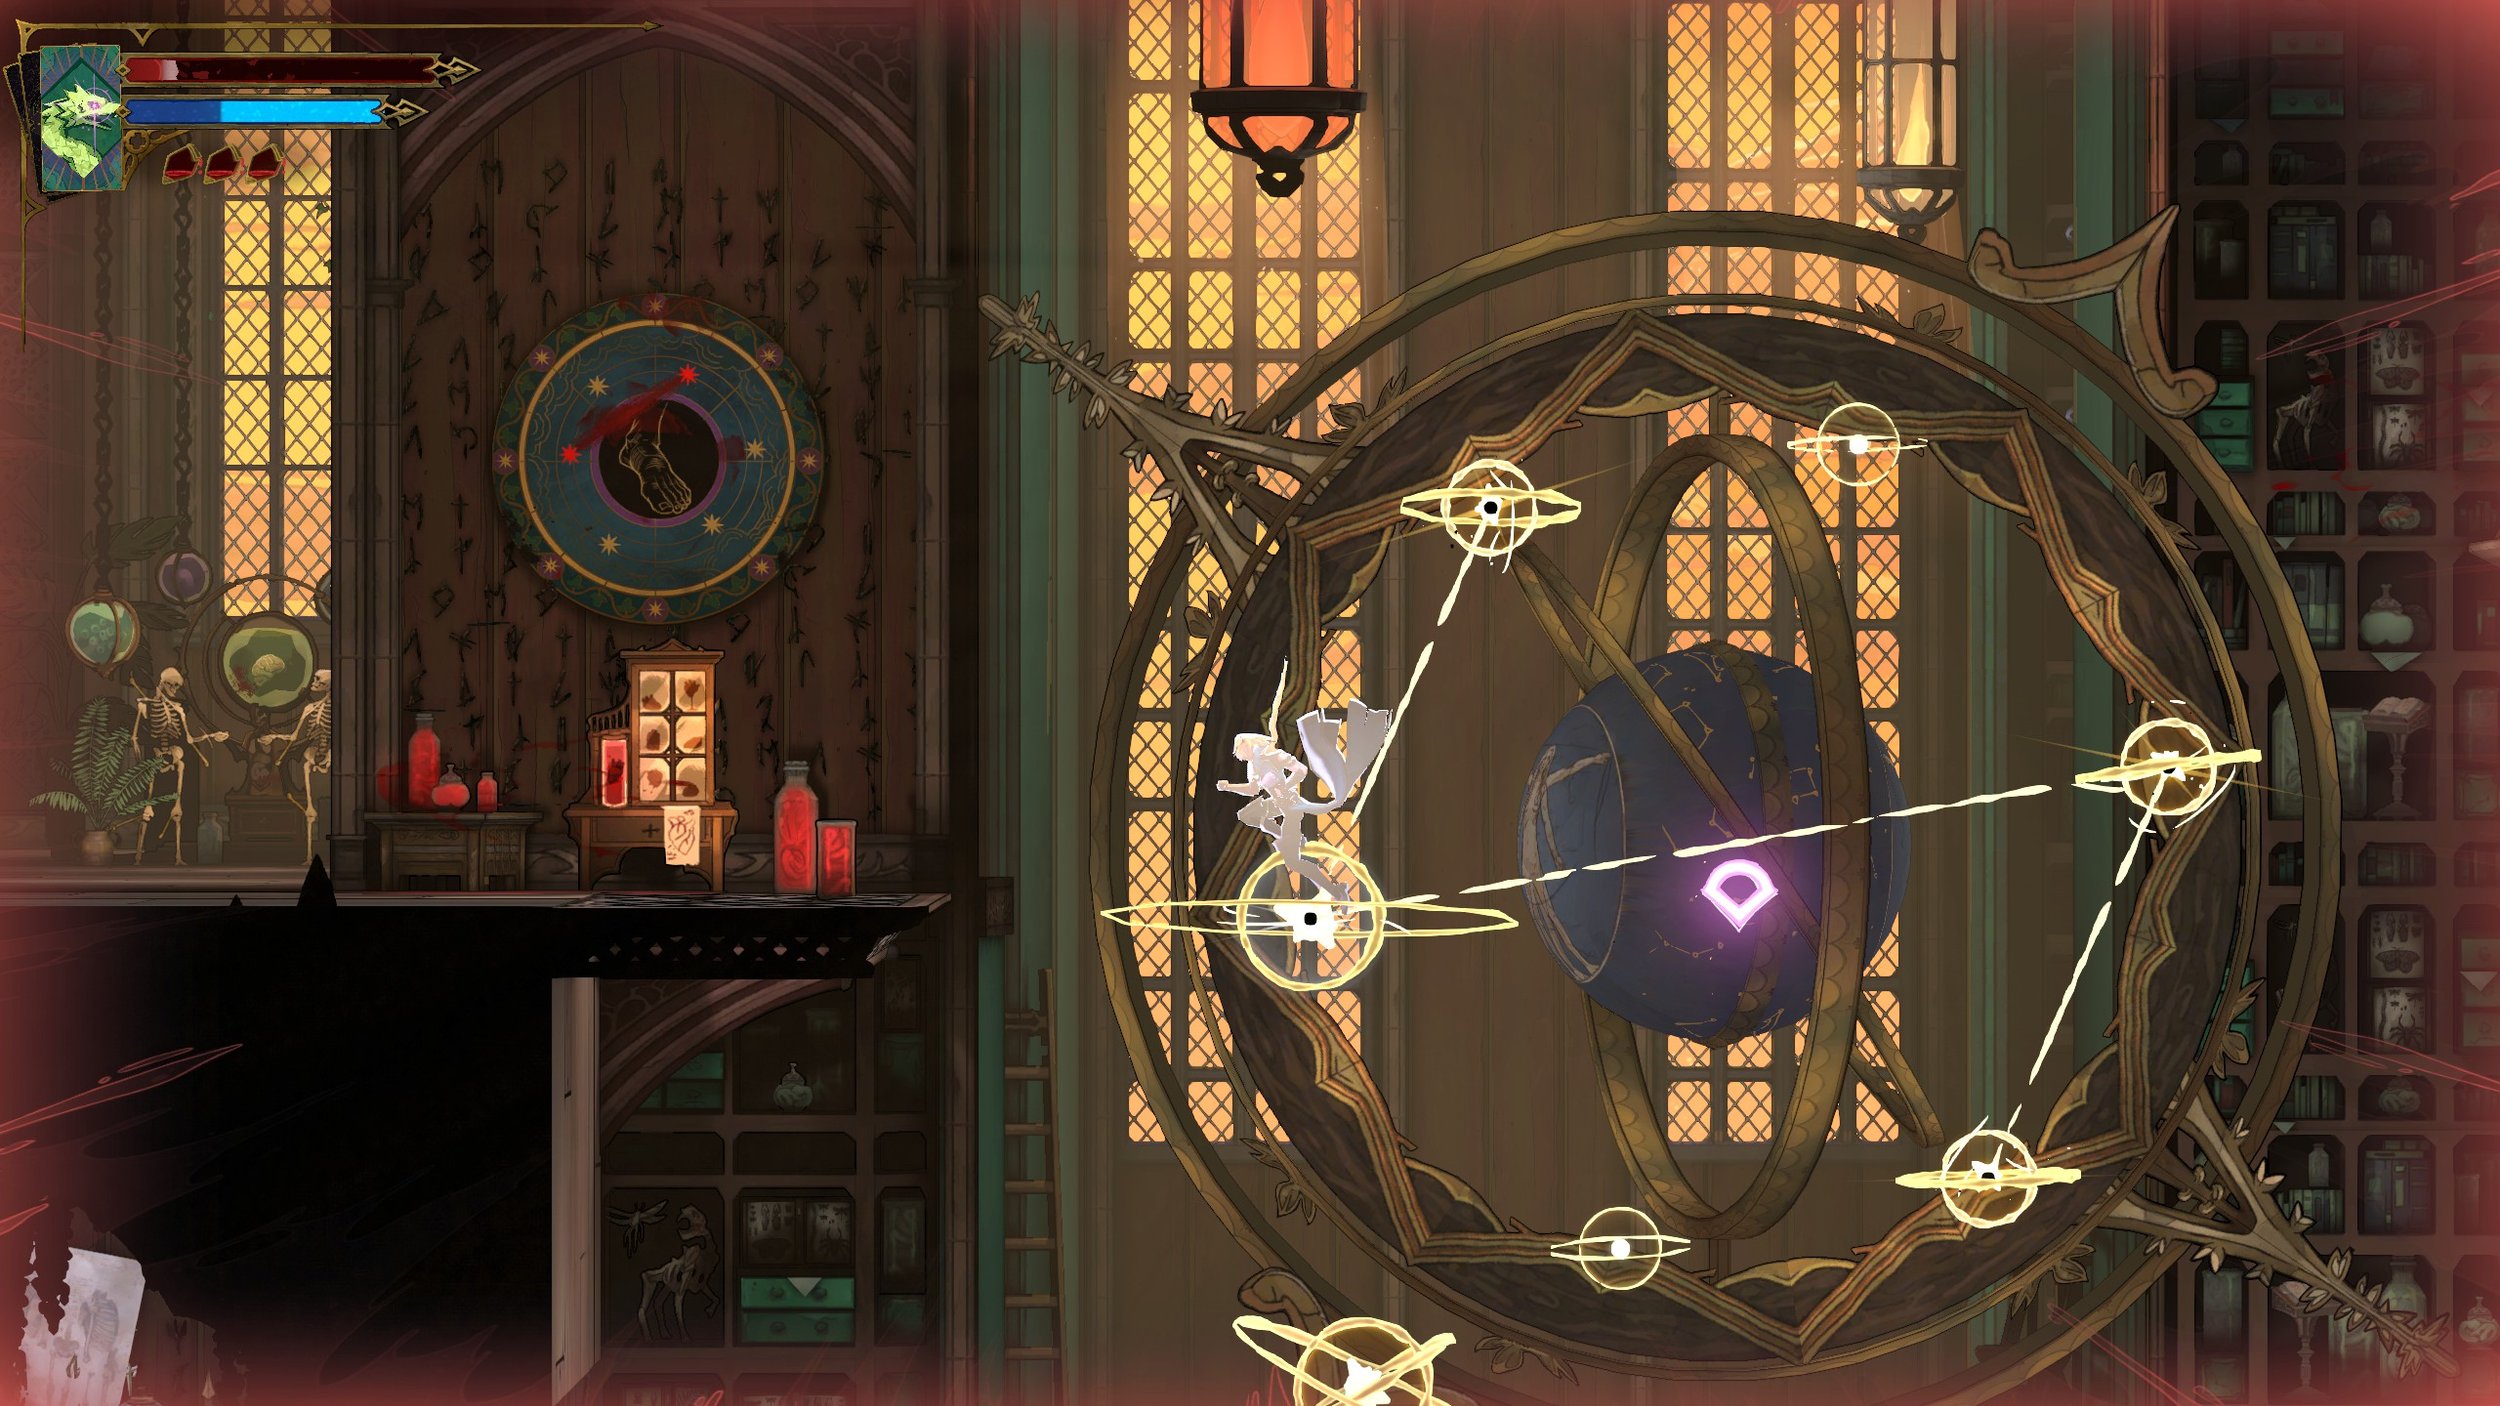
Inputting that will let you access the bounce points on the second of the three globes. But there’s still the skeleton globe to concern yourself with, as you won’t be able to reach the Library boss without it. However, the game doesn’t exactly give you any clues for this last one quite like the two examples before. You’ll instead need to spot it directly in the environment. You’ll find the constellation pattern below in a specific room.
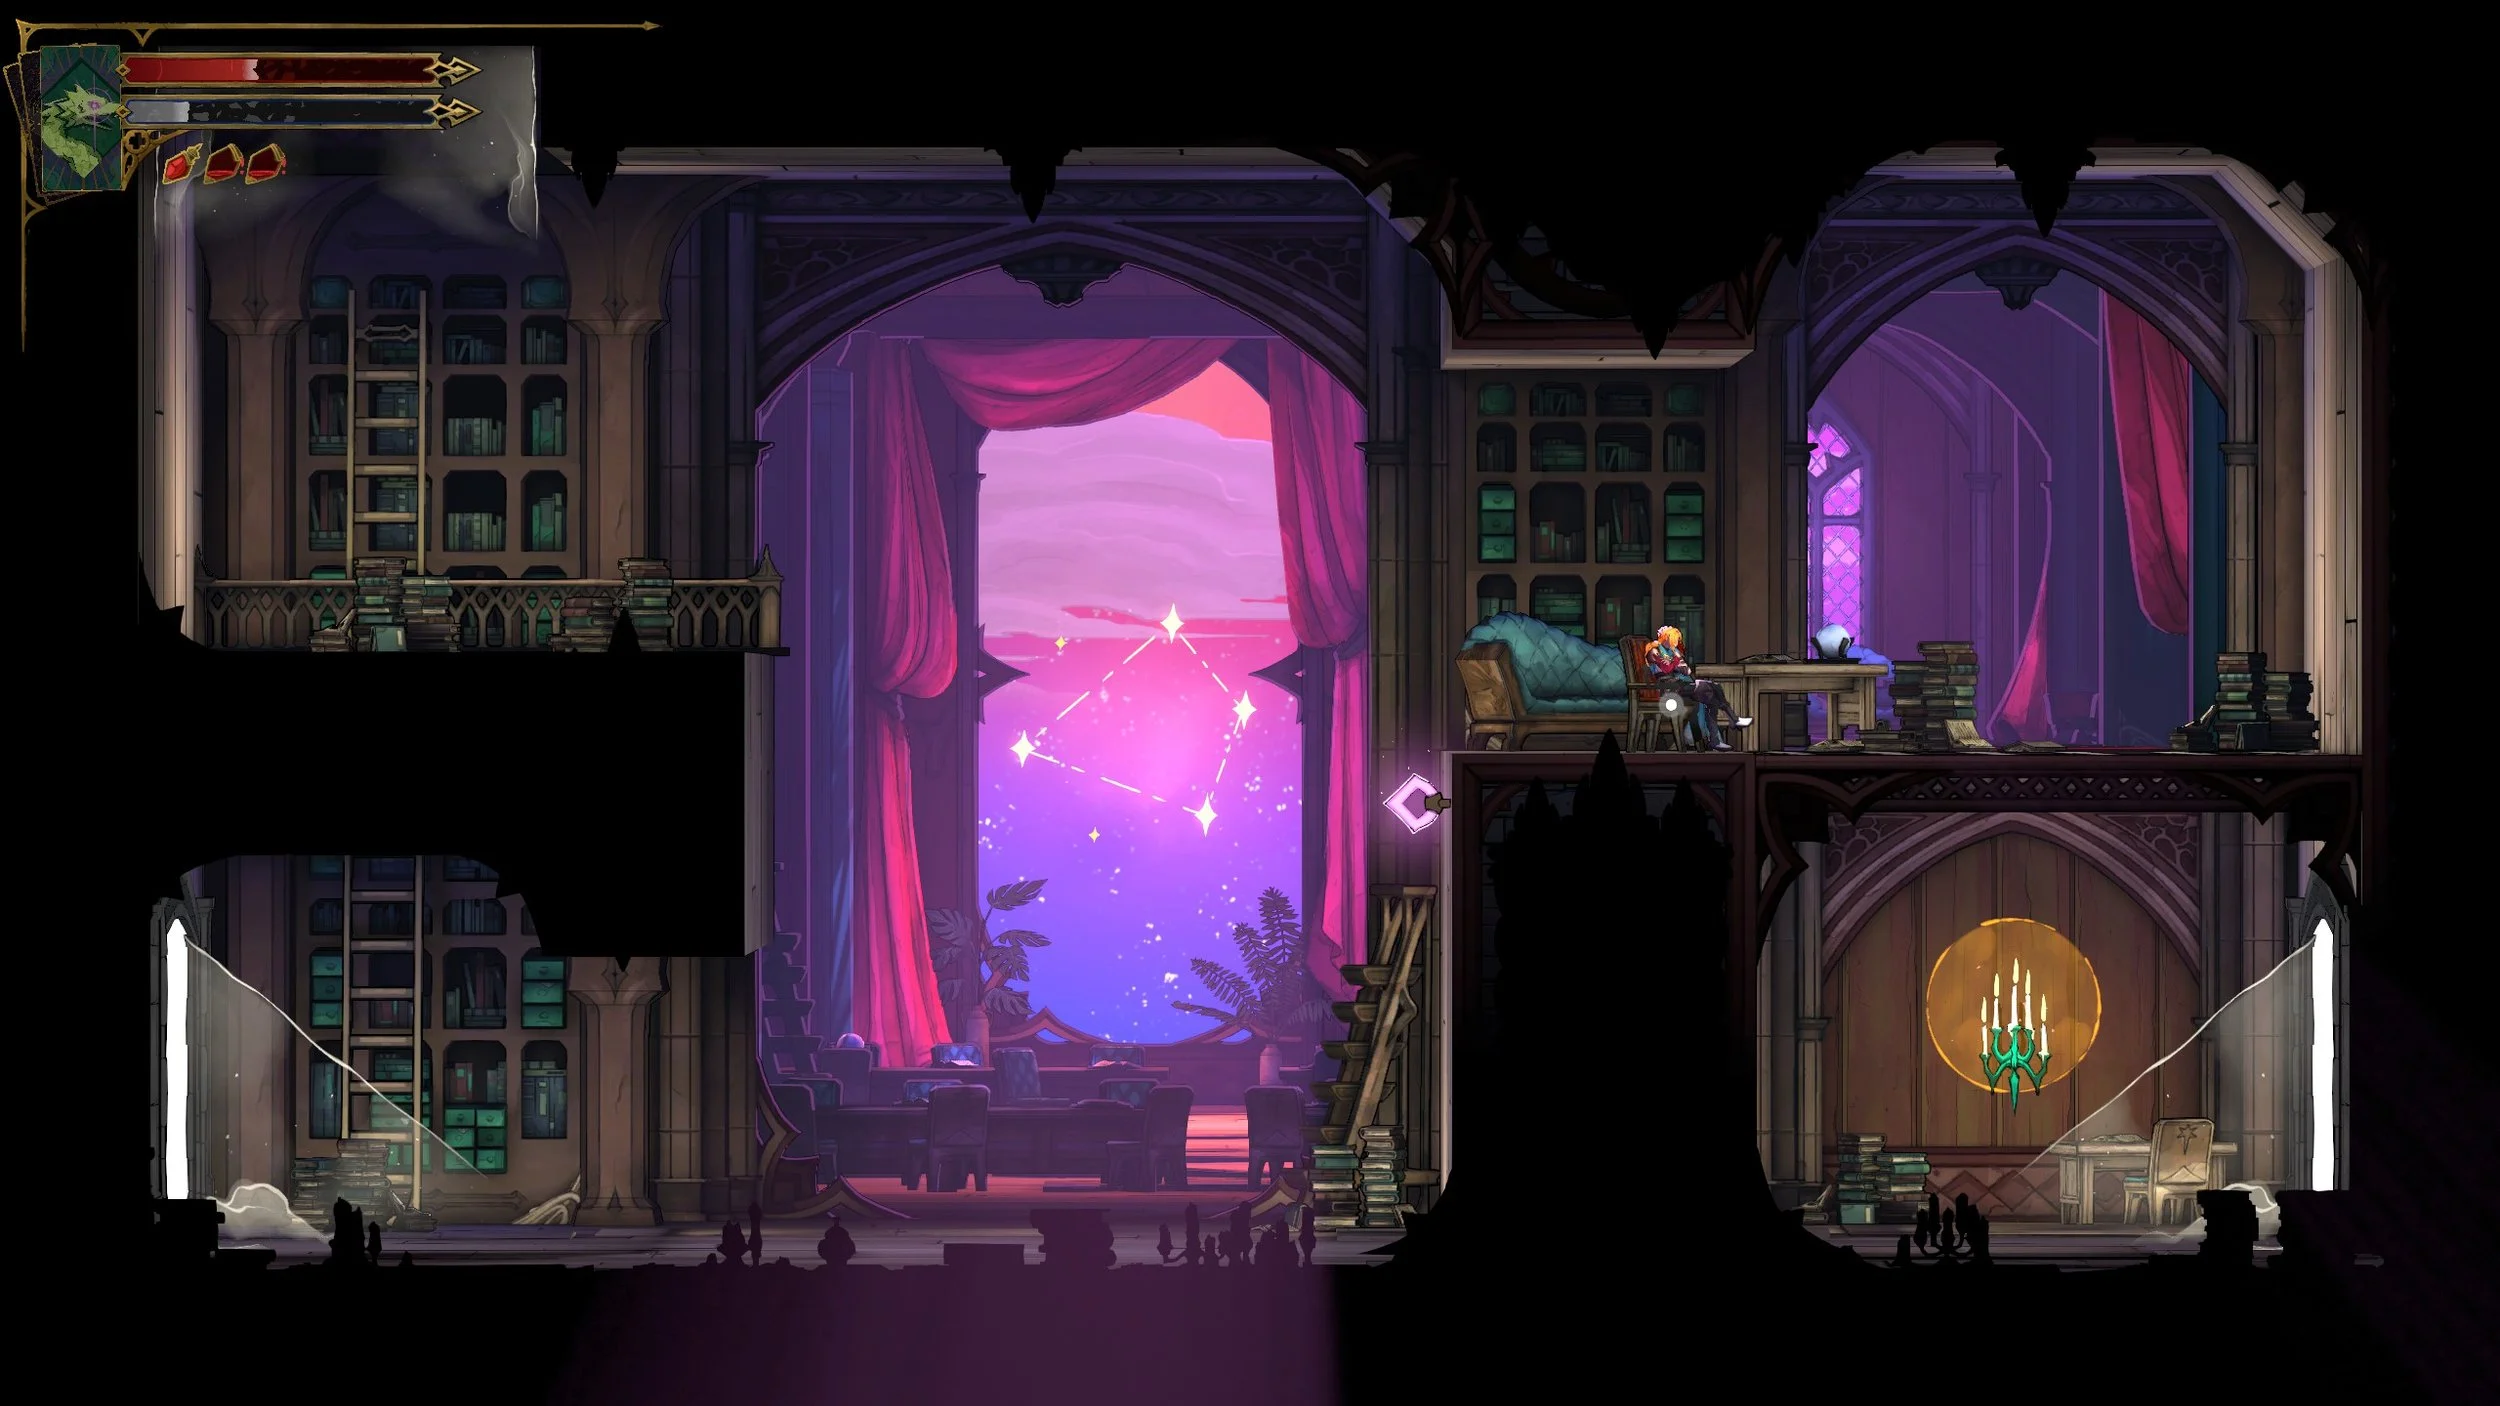
In case it’s not clear, that’s the solution right there, although you may think it’s just a random view of the night sky. All you need to do is input that pattern into the skeleton globes like this.
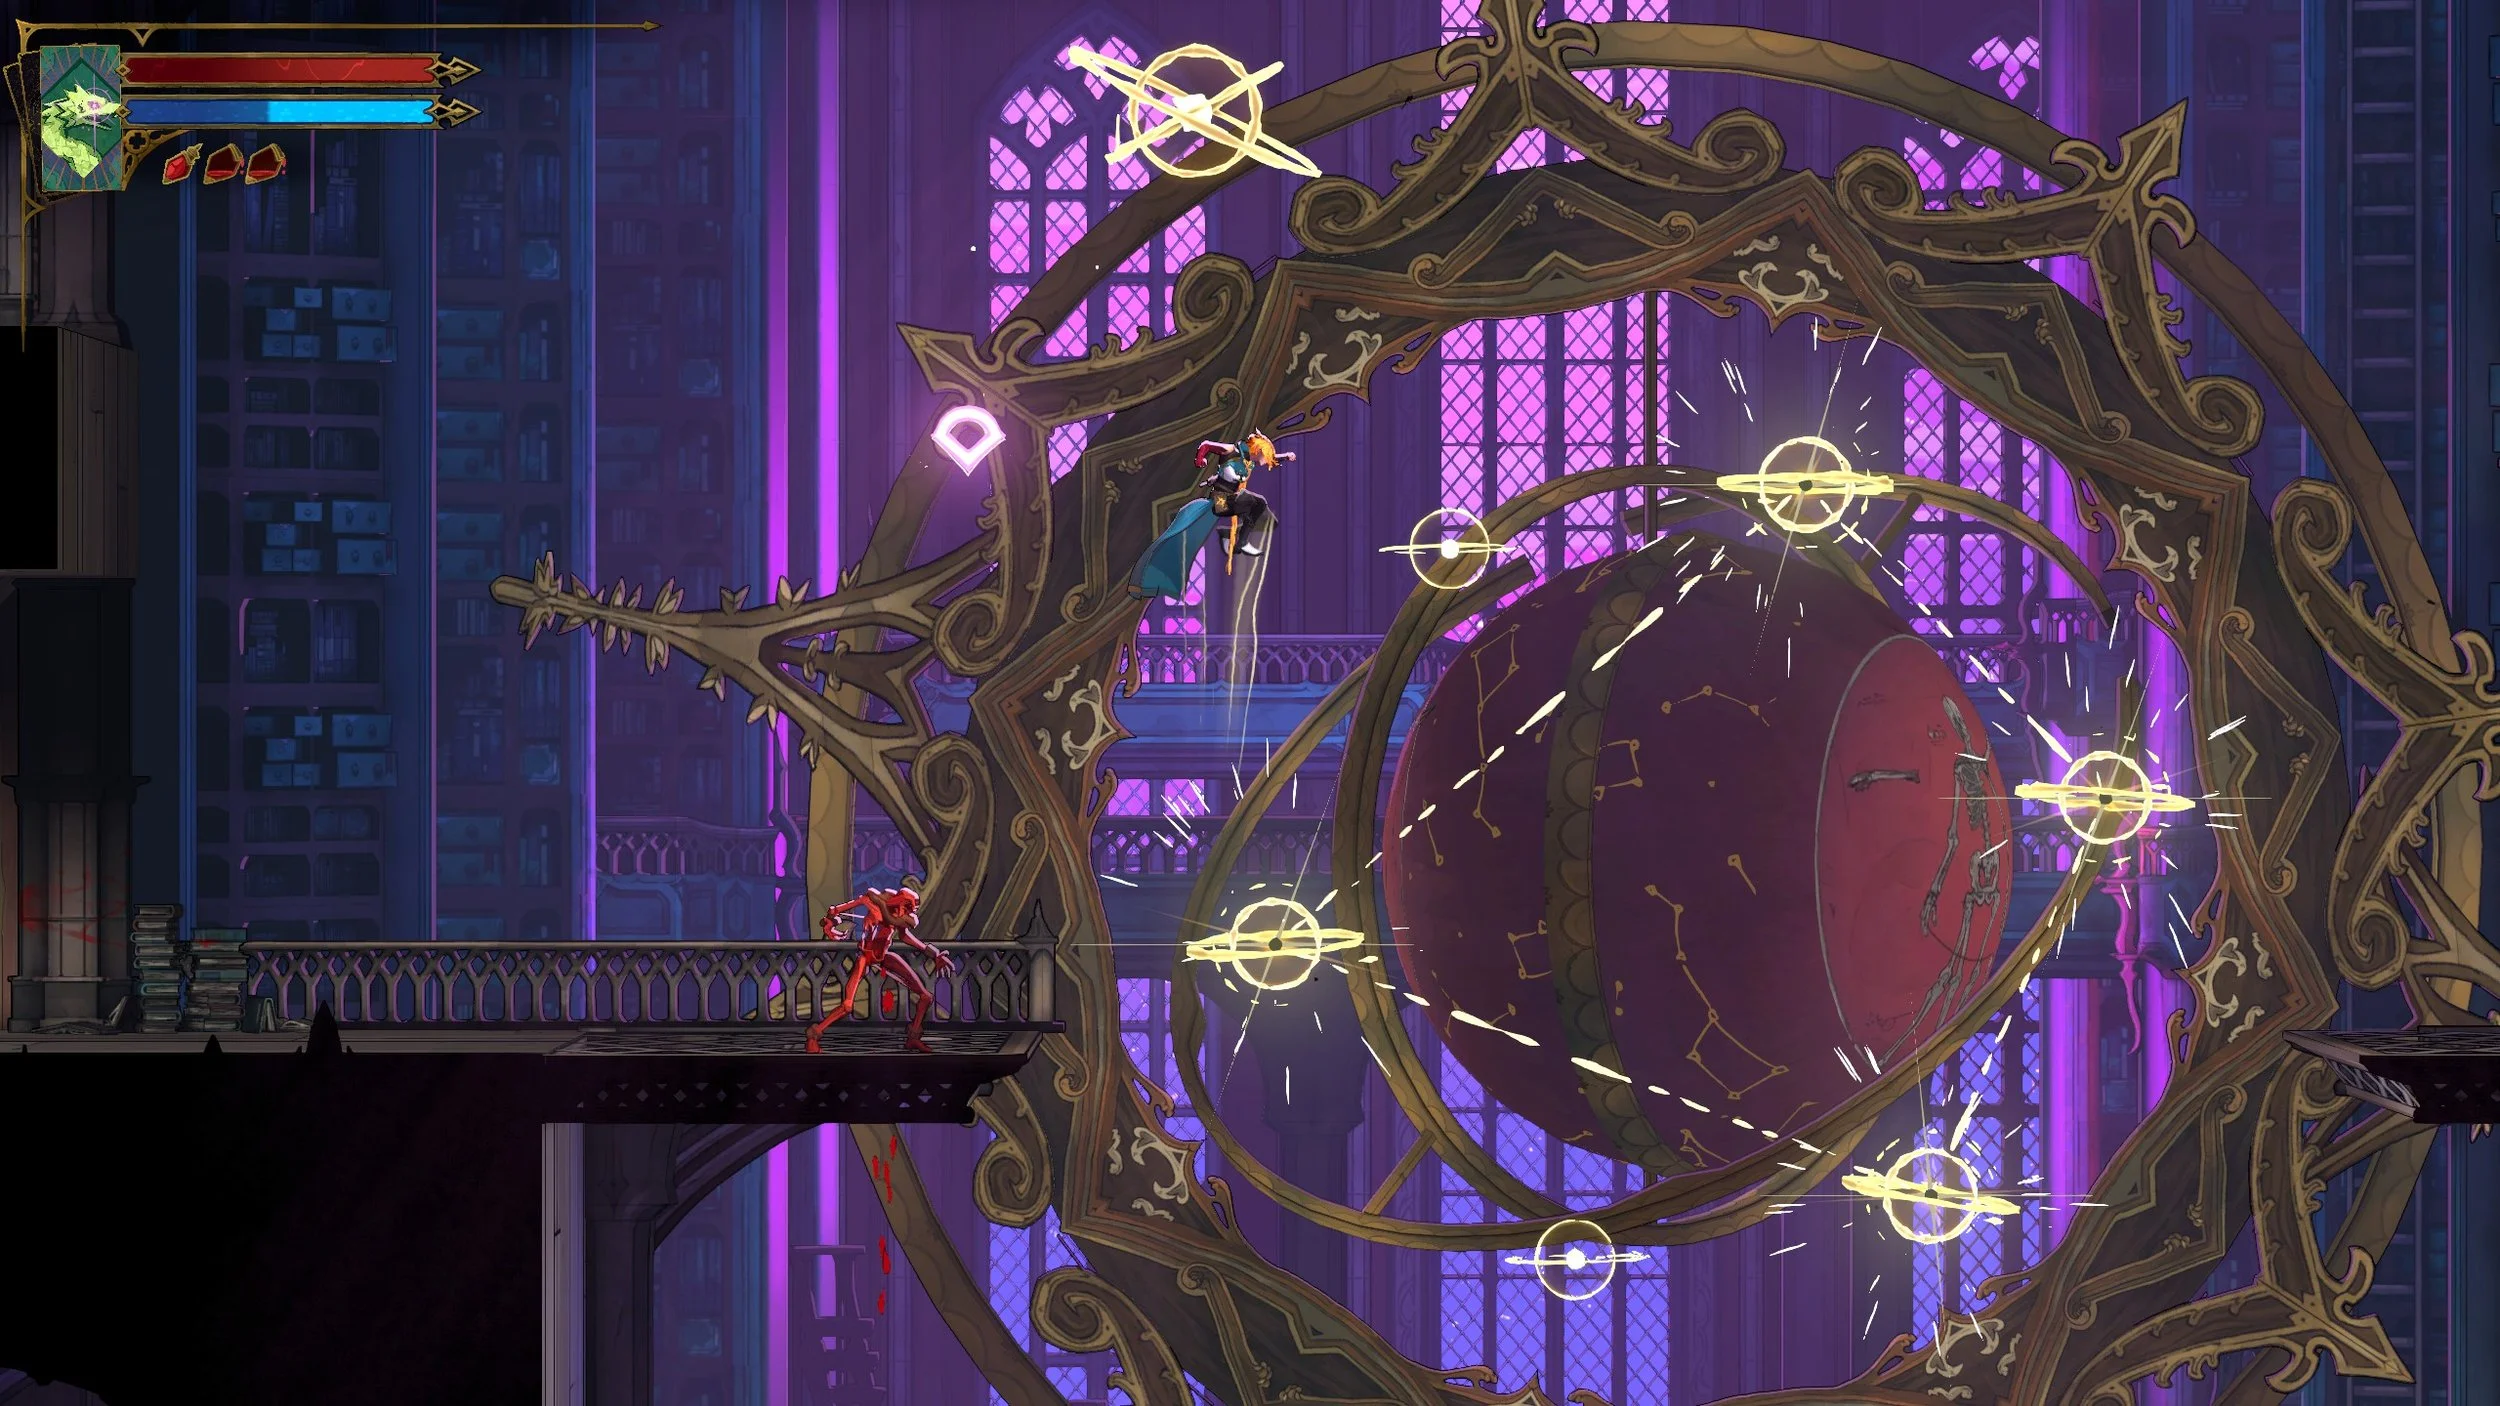
With the above, you can now access the boss room in the library, where you’ll face Carmilla. That’s all there is to know about activating the Library’s astrology globes in Castlevania: Belmont’s Curse, but there are still things to find in the area, so don’t neglect your searching duties!